Brampton Paving Services
Brampton Interlocking, Driveway

The most common question that is always asked when it comes to interlocking driveway is why would anyone want it when you can have asphalt or concrete instead? Every material has its advantages, but the authentic beauty of paving is in interlocking! That is correct. You can see below the six benefits of interlocking:
Quick and Easy: It is beautiful, good on the environment and it does not affect traffic.
Highly Durable: Interlocking is commonly known to be resistant to pressure, scratches, cracks as well as it is shatterproof. These benefits alone greatly extend the durability in the long run of the road as well as increases the aesthetics and safety.
Instantly Usable: We mean instant! Once the bottom layer is paved with fine sand, the bricks are laid down and it is ready to be rolled on. There is absolutely no waiting time compared to other materials like asphalt and concrete.
Low-cost Maintenance: If at any point any sort of maintenance is needed like a replacement of one of the interlocking bricks, anyone can do it. It is that simple!
Great Friction Per Cube Surface: There is no issue with the slippery surface with Interlocks when there is any sort of rain or downpour.
Brick and Style Type Choices: There is a vast selection to choose from when it comes to brick types and what patterns you want to use. This is where your creativity can really shine.
Highly practical: Interlocks can be laid down in every area you can think of from parking lots to driveways, narrow or wide pathways and school parking lots, and many tourist attraction areas for simplistic beauty. There isn’t a better choice to make than the versatility in Interlocking.
The Process of Interlocking
If you have ever wondered how anyone created any sort of pattern or how exactly they came about that design? We will show you how it is done and where all this begins, where it ends. Here is the breakdown of the seven steps to beautiful interlace paving.
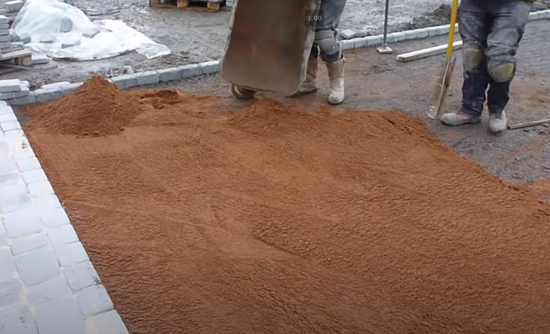
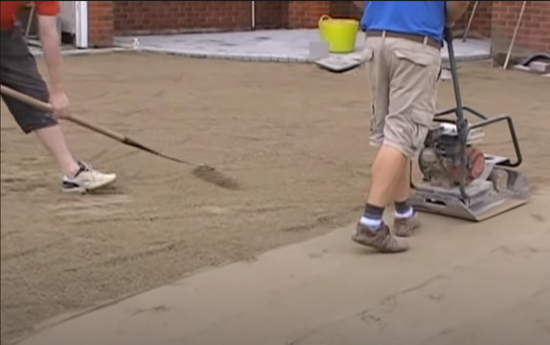
- Leveling the Surface Area: This is done by using a vibrator roller to compact the ground. You must lay down a lining of sand. The thicker you lay it down, the larger the area that needs to be chosen. However, it is not recommended to exceed the thickness of the interlink when laying down sand. The correct size should be between 5 to 8 millimetres.
- Sweeping the Sand: This step requires your attention. In order to get the laying process smooth, you must ensure the lining sand is as flat as possible.
- Lining Horizontally: A real professional can simply eyeball the four sections of the paving area as well as both diagonals. Like most of us we are not at that level yet and must take our time and be careful to achieve greatness.
- Laying down the Bricks: There is no written law that states you need to start from point X and build form there. When laying down the bricks, you should start form the innermost area and build outwards. What needs to be done so the sand you have laid does not get ruined, is step on the bricks you have already laid out and keep doing that throughout the whole build or creation process.
- Lining Up the Lines Horizontally: Any time you lay down bricks or slabs, most of the time they will be unparallel. You can fix that issue easily by using a flat screwdriver in between the gaps so that all the bricks line up properly. Most experienced brick layers do not always need to do this process as they have done it many times over the years and can practically do it with their eyes closed: Although no one does that!
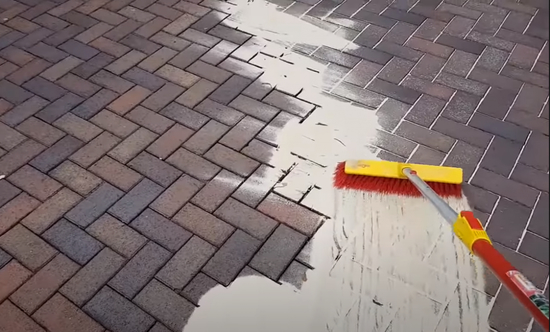
- Compacting: This process or step requires you to apply dry sand on interlocks that you have just laid down. You sprinkle it evenly around the whole area. An important note to make here for yourself is to make sure your sand is always dry and that it is fine sand. Anything beyond this recommendation will not fill in the gaps of the interlocks properly. Once this process has been completed, this is where you pass your vibrating roller over two to three times so the sand gets all the way into the gaps.
- Final Touch-ups: Grab a big broom, sweep off any sand that is left on top of the bricks or slabs and you are all done! Take a step back and admire your creation and all your hard work.
This is all applicable to different road ways or even pothole repair.


Contact Us Today
Call Us Today
289-801-6372